Reverse Image Search with Vertex AI
Firebase
Dec 9, 2023
Introduction
AI’s ability to process and analyze images has advanced significantly, and much like text search, the ability to search for similar images based on a reference image is becoming increasingly valuable.
The Reverse Image Search with Vertex AI extension provides an out-of-the-box solution for providing a search solution for images through the usage of the Vertex AI Vector Search.
Vertex AI Vector Search
This product forms the foundation for search technology including Google Search, YouTube, and Google Play. Once installed, the extension will create a new index that can store information about the images you have selected to be indexed through Firebase Storage. These vector representations will be stored and searched through Vertex AI Vector Search.
Getting Started with Reverse Image Search with Vertex AI
Before you can access Reverse Image Search with Vertex AI, ensure you have a Firebase project set up. If it’s your first time, here’s how to get started:
Once your project is prepared, you can integrate the Reverse Image Search with Vertex AI extension into your application.
Extension Installation
Installing the “Reverse Image Search with Vertex AI” extension can be done via the Firebase Console or using the Firebase CLI.
Option 1: Firebase Console
Find your way to the Firebase Extensions catalog, and locate the “Reverse Image Search with Vertex AI” extension. Click “Install in Firebase Console” and complete the installation process by configuring your extension’s parameters.

Option 2: Firebase CLI
For those who prefer using command-line tools, the Firebase CLI offers a straightforward installation command:
Configure Parameters
Configuring the “Reverse Image Search with Vertex AI” extension involves several parameters to help you customize it. Here’s a breakdown of each parameter:
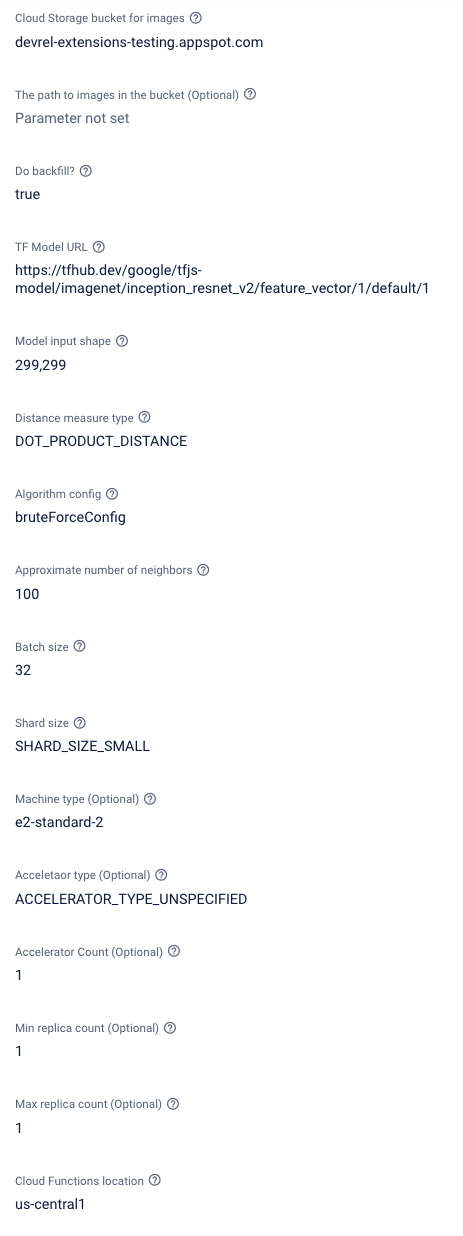
- Cloud Storage bucket for images:
Which Cloud Storage bucket will have images you want to index and search? - The path to images in the bucket (Optional):
If images are located inside a folder in the bucket, what’s the path? If empty the root of the bucket will be used. - Do backfill?:
Whether to backfill embeddings for all images currently in the specified storage location. - TF Model URL:
The URL to the TensorFlow(TF) model exported to JSON with weights. The extension currently supports any custom TensorFlow.JS model that accepts images and returns feature vectors. This will be used to generate vector embeddings in Vertex. The URL must be public and points to a directory with model.json and **.bin files. Check https://www.tensorflow.org/js/guide/save_load for more details. - Model input shape:
The input shape of the model. You are required to know the input dimensionality that your model supports, as the extension needs to resize images before feeding them into the image feature vector model. As an example, if the model expects 224x224 images, the input shape is224,244. - Distance measure type:
The distance measure used in nearest neighbor search. The default is dot product. Read more about distance measures here. - Algorithm config:
The configuration with regard to the algorithms used for efficient search. Read more about algorithm config here. - Approximate number of neighbors:
The approximate number of neighbors to return in the response. Read more about this parameter here. - Context:
Contextual preamble for the language model. A string giving context for the discussion. - Batch size:
The batch size used to generate feature vectors for existing images. The larger the batch size, the more time and memory are required. Do not set a size larger than 64. - Shard Size:
The size of the shard, which correlates to the machine type used. Read more about shards config here. - Machine type (Optional):
The type of machine that is deployed for the index endpoint. Read more about machine types config here - Accelerator type (Optional):
The minimum number of machine replicas for the deployed index endpoint. Read more about min replica counts config here. - Accelerator Count (Optional):
The number of accelerators to attach to the deployed index endpoint machine. Read more about accelerator counts config here. - Min replica count (Optional):
The minimum number of machine replicas for the deployed index endpoint. Read more about min replica counts config here. - Max replica count (Optional):
The maximum number of machine replicas for the deployed index endpoint when the traffic against it increases. Read more about max replica config here. - Cloud Functions location:
Where do you want to deploy the functions created for this extension? For help selecting a location, refer to the location selection guide.
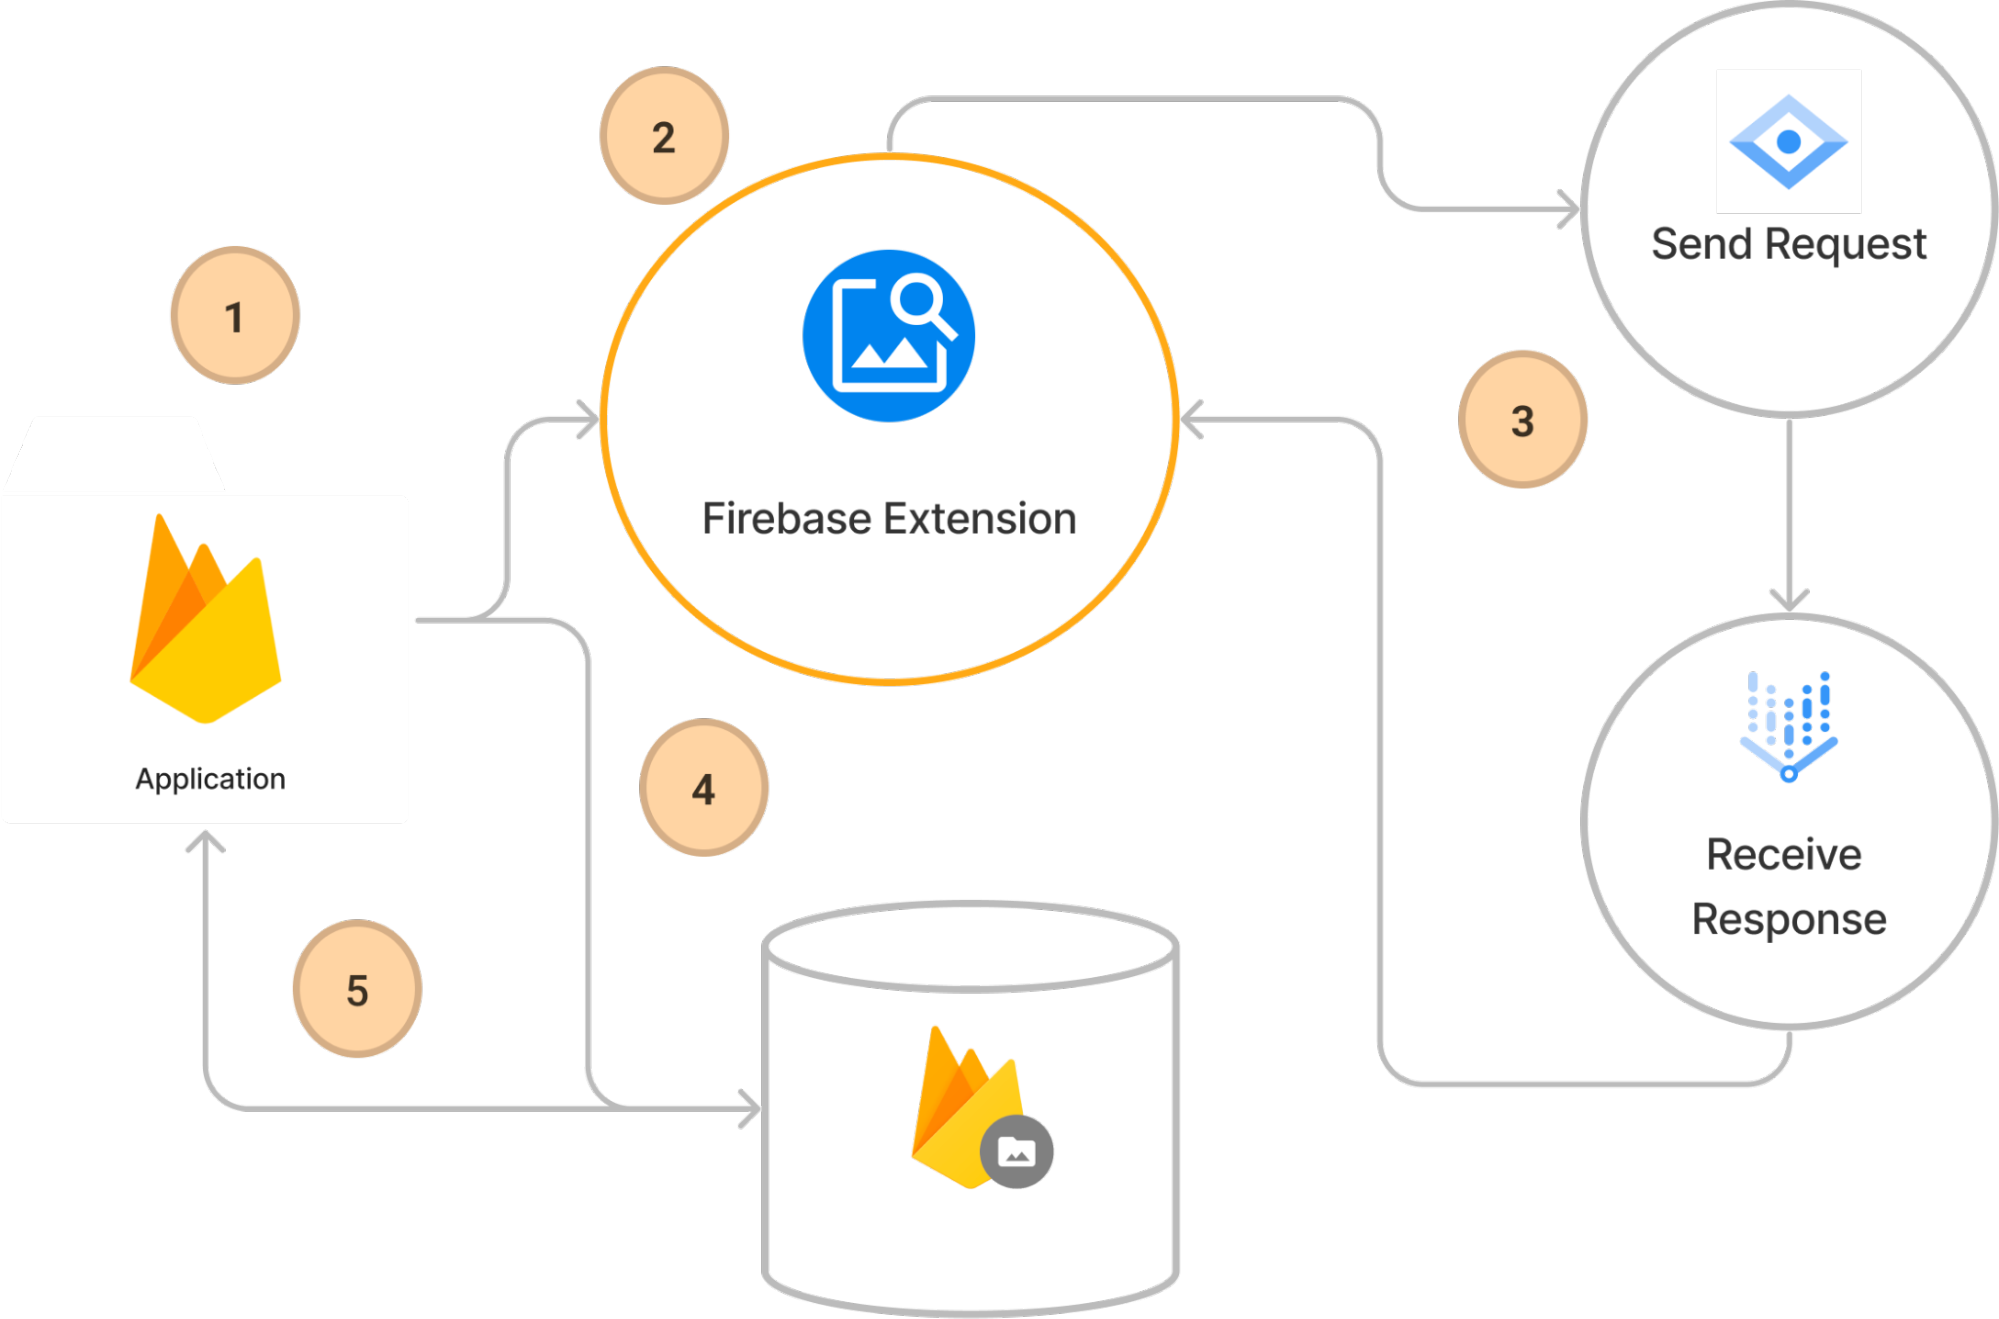
How it works
On installation, if backfill has been selected then the extension will automatically index all of the images in the specified storage location. This will create vector based representations of the image that can then be compared in the future.
After installation and configuration, the extension provides an endpoint to allow developers to search for similar images to the one provided. Any new images that are added to the storage location will be automatically indexed, this applies to new, updated, and deleted images To see it in action:
- Add a new image to the storage location: This will quickly index the new item in the Vertex AI database.
- Find a base64 representation of an image for comparison: The search functionality works by taking the base64 representation of an image. This is then converted into a vector representation that can be sent to the matching engine.
- Successful responses: The AI will return a selection of images that closely match the provided image.
- Image results Ids: The result will contain a result of ids of the images that closely match the provided query.
- Load the images:: Using client sdk you can now download and display the image on a UI based on the ids returned in the search result.
Steps to using the Reverse Image Search with Vertex AI
Before you begin, ensure that the Firebase SDK is initialized and you can access Firestore.
const firebaseConfig = {
  // Your Firebase configuration keys
};
firebase.initializeApp(firebaseConfig);
const db = firebase.firestore();
const auth = firebase.auth();
const storage = firebase.storage();
Next, ensure that a user has successfully logged into the client.
import { signInAnonymously } from 'firebase/auth';

/** Sign in annonomously */
signInAnonymously(authRef).then(() => {
  console.log('Signed in anonymously');
});
Setup a httpCallable function reference.
import { httpsCallable } from 'firebase/functions';

/** Get the search onCall function */
const fnName = 'ext-storage-reverse-image-search-queryIndex';
const search = httpsCallable(functionsRef, fnName);
Now you can upload an image and search, the search value is a base64 value of the image.
import { ref, getDownloadURL } from "firebase/storage";

/** Listen for file upload */
fileUpload.addEventListener("change", async (e) => {
  //@ts-ignore
  const file = e.target.files[0];

  /** Load the file into the file reader */
  const reader = new FileReader();

  /** Set the onLoad function */
  reader.onload = async (e) => {
    /** Assign a base64 version of the image */
    const base64Image = e.target.result as string;
    const base64Data = base64Image.split(",")[1];

    /** Run the search function */
    const { data: response } = await search({ query: [base64Data] });

    /** Download the images */
    const { neighbors } = response.data.nearestNeighbors[0];

    for await (const neighbor of neighbors) {
      const { datapointId } = neighbor.datapoint;

      const objectRef = ref(storageRef, datapointId);
      const objectUrl = await getDownloadURL(objectRef);

      /** Update the UI */
      console.log(objectUrl);
    }
  };

  /** Read in the data */
  reader.readAsDataURL(file);
});
The results of this are a list of downloadable links for the closest matching images from your storage bucket. Use these to populate your UI with the results.
Conclusion
By installing the Reverse Image Search with Vertex AI extension, you can leverage a custom Vertex AI implementation to search based on image similarity. Responses are highly configurable, allowing many customization options for developers.